

We don’t know about you, but the new-and-improved MCO 3.0 has left us longing for the company of our beautician once more. Unsightly breakouts, clogged pores and dryness barely begin to describe the magnitude of the problem: luckily, we’ve got a solution.
We’ve come up with a DIY facial you can do at home to give your skin some much needed TLC while you wait for your next appointment—and for beauty services to reopen once more.
It’s easy, it’s only 10 steps, and you probably already have everything you need in your beauty closet (though, if not, we’ve curated a few of the beauty brands offering free home delivery on your favourite beauty essentials!). The steps are as follows:
 Wash your hands thoroughly with soap and water
View this post on Instagram
*Sparkles are for illustration purposes only.
You should be a pro by now when it comes to proper hand-washing. You already know why we need to do this.
 Remove your makeup with a gentle makeup remover
You’re probably not wearing any, but just to make sure we start off with a clean slate, you’ll want to remove any and all makeup. Double cleansing is the way to go to effectively remove all traces of makeup, buildup of sebum and dirt from your skin. Opt for a cleansing oil or micellar water to remove makeup gently but thoroughly.
TIP: If you’re wearing SPF, the best way to remove it is with cleansing oils and balms.
Use: SK-II Facial Treatment Cleansing Oil
 Cleanse your face with an invigorating massage
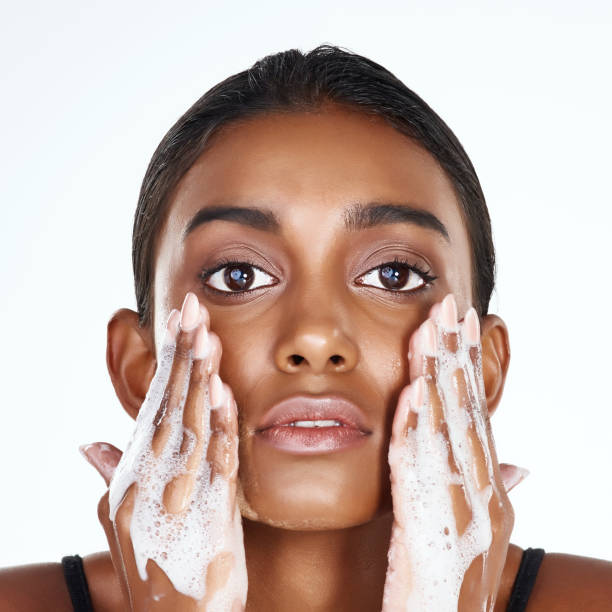
Once your face is bare and prepped, it’s time to cleanse! This is a good opportunity to get the blood flowing in your cheeks, so massage your favourite cleanser into your skin using circular motions. Abide by the 60-second rule when it comes to cleansing. This way, the product can actually dissolve sebum and dirt while softening your skin effectively. Remember to use tepid or cool water to cleanse.
Note: When massaging, make sure you’re keeping the pressure light. Alternatively, you could use a facial massager to get the job done nicely.
Use: Omorovicza Moor Cream Cleanser, which is the perfect solution for problematic skin.
Steam your face to soften the sebum in your pores
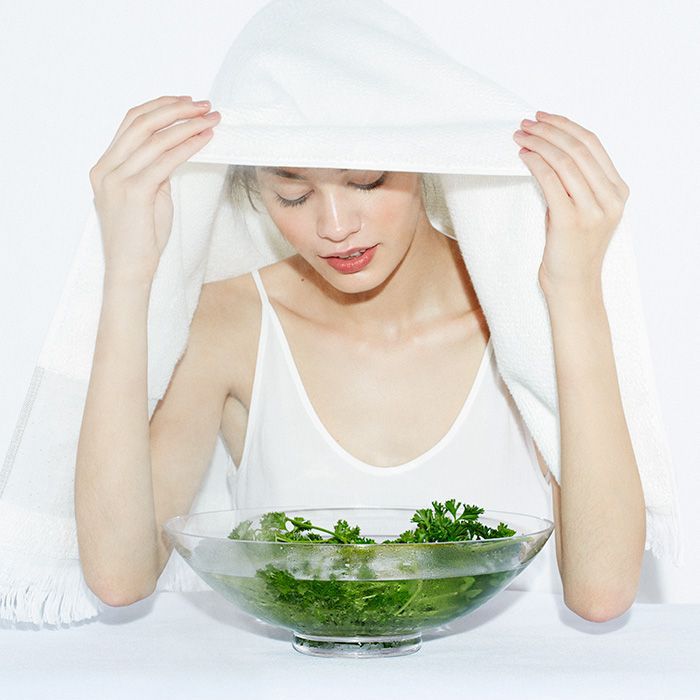
You really don’t need a fancy, sophisticated steam machine to help you out with this step—a bowl of steaming hot water and a damp towel will suffice!
Simply position your face above the bowl, then sling the towel over the back of your head, making sure it covers you and the bowl to maximise the humidity. Stay put for 10-15 minutes and voila! You’re all steamed up.
Note: Whatever you do, do NOT place a hot towel directly over your face—it’s unsanitary and the heat is terrible for your delicate skin.
 Gently exfoliate
The world is your oyster with this one: you can opt for either a physical or chemical exfoliant, both of which work just fine. It’s one of the most important steps in this routine as it removes excess dry skin and promotes blood flow, which preps the skin to absorb other products more efficiently. Plus, it’ll make your skin feel smooth and silky—win!
Use: Tatcha The Rice Polish Classic—packed with nourishing Japanese rice bran that transforms to a creamy foam upon contact with water.
 Purifying clay mask
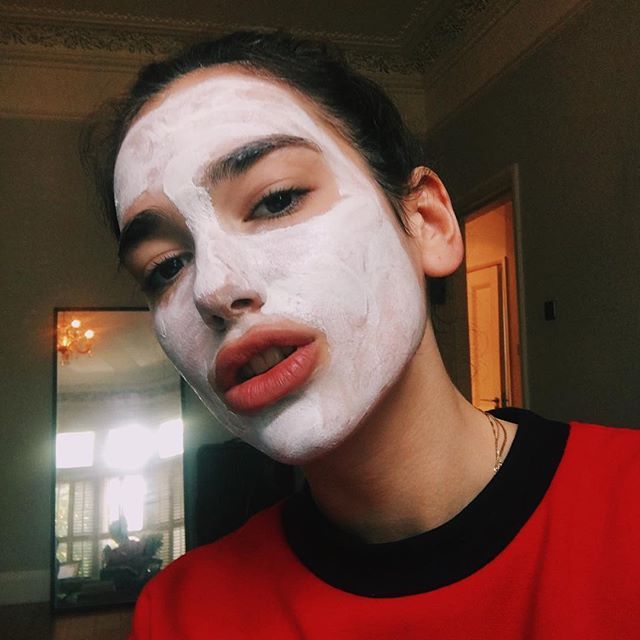
Here’s where the nitty gritty cleansing comes in. For purified pores and reduced blemishes, clay masks are your best friend. If you’re not familiar with clay masks and are unsure which to go for, here’s a simple guide: yellow and red clay powders are great for sensitive skin, while white, kaolin and green clay works best for oily skin.
READ: Clay masks 101: How to pick the right clay for your skin and how to apply it properly
Simply apply an even layer, leave it on for five to seven minutes, then rinse it off with warm (not hot) water.
Note: Do not leave the clay mask on your skin until it completely dries out as this may potentially damage your skin.
 Tone
Tone
READ: 8 best toners for every skin type
This step will help to restore your skin’s natural pH balance as well as remove any remaining traces of the mask. For maximum benefits, use a hydrating toner with ingredients like rose water, ginseng, or ceramides that are anti-inflammatory, hydrating, and soothing.
Use: Elemis Rehydrating Ginseng Toner
 Hydrating face and eye mask

If you thought we were done with hydration, buckle up—we’ve barely even started. At this stage, you’ll want to hydrate your skin as much as you can for that extra glow and plumpness. You could opt for a wash-off mask or a sheet mask—whichever you feel like using. If you need any suggestions, we’ve compiled our favourite hydrating masks of every kind for your convenience!
READ: 10 Best hydrating masks for parched skin
 Spot treat
Once your skin has been quenched, begin to spot treat problematic areas; your regular spot cream will work for any obvious blemishes or brightening treatments for any dark spots. Look for ingredients such as salicylic acid, benzoyl peroxide, tea tree oil, and AHAs in your spot treatment label.
Use: Clinique Anti-Blemish Solutions Clinical Clearing Gel
 Eye cream, moisturiser and SPF
We’ve reached the final step in this pamper session; moisturiser and SPF. To lock in all the benefits of your hard work, you’ll want to layer on the moisturiser and eye cream to give you that natural, hydrated, dewy glow. Then, you’ll want to reach for the sunscreen to top it all off: SPF is non-negotiable (even indoors), so don’t you dare skimp on the sunscreen.
Voila, that’s it! An easy peasy facial that you can achieve at home to give your dull, dry (and clogged) skin a much needed boost.
For more skincare stories like this, click here.
| SHARE THE STORY | |
| Explore More |


