The Ultimate Cuticle Care Routine for Pretty Nails (and How You’re Getting It Wrong)
Hands up!
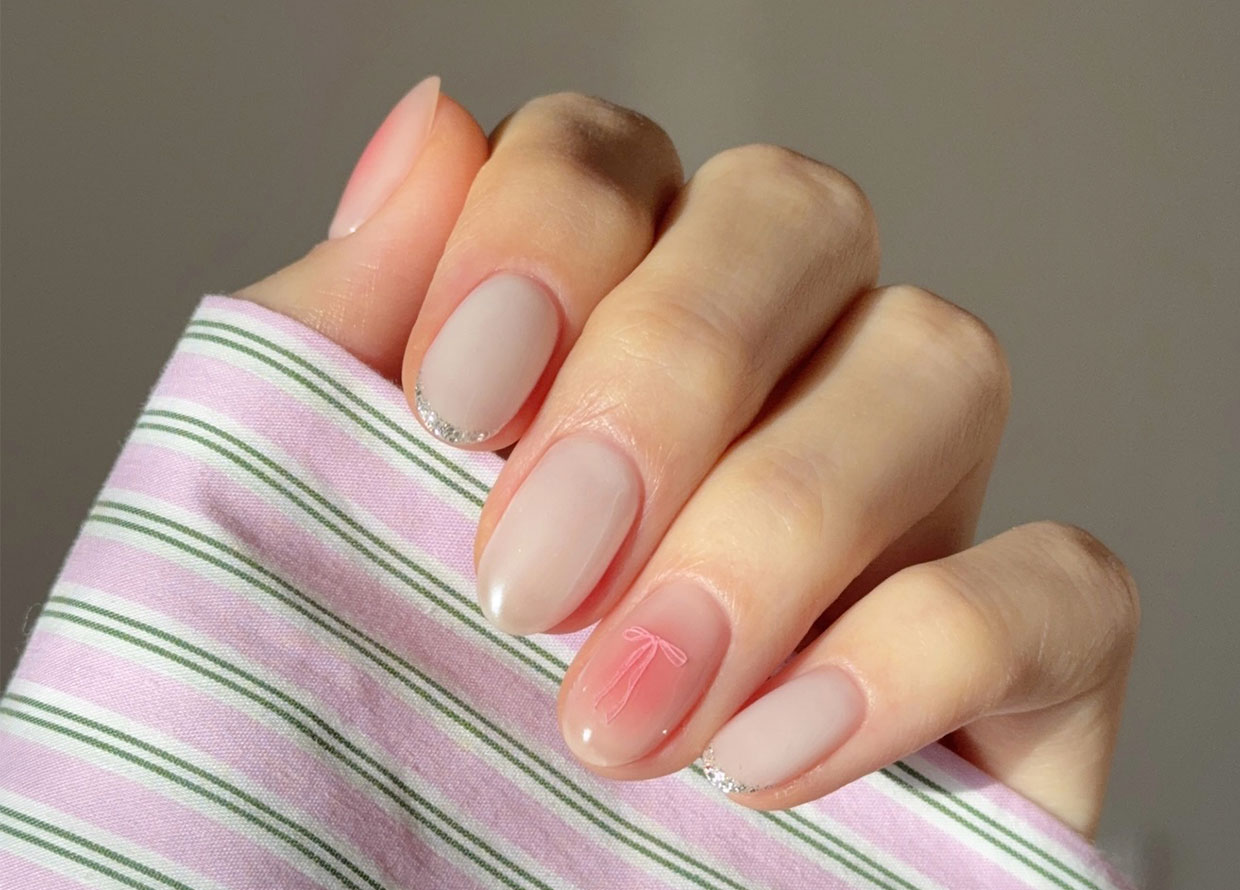
From the difference between your cuticle and eponychium to the mistakes you’re making with your routine, we walk you through the ins and outs of cuticle care.
What does your DIY nail care routine look like? Unless you’re heading to the salons every month, it probably entails a haphazard trim followed by an equally half-hearted attempt at filing and shaping. Sure, it does the trick—your nails are left a more reasonable length and, really, who is looking that closely?
Us. We’re looking at your nails, and we’re horrified, frankly. Sure, from afar, it’s fine, but up close? They’re a mess! The shape and length are passable, but what is going on with your nail beds? Overgrown, cracked, ragged—surely there’s something you can do about that?
READ: 9 Manicure mistakes that may be destroying your nails
And, in fact, there is! When it comes to at-home cuticle care, we’ve got you covered on all fronts. From acquainting yourself with the proper anatomy to a step-by-step guide to your at-home manicure, find all the details below:
First up, what is a cuticle?
If you look at the nifty diagram below, you’ll probably find that your nail anatomy is way off. That’s right—what most people refer to as the cuticle is actually the eponychium. These two distinct parts of the nail are often confused or used interchangeably, despite the fact that they actually have completely different functions.
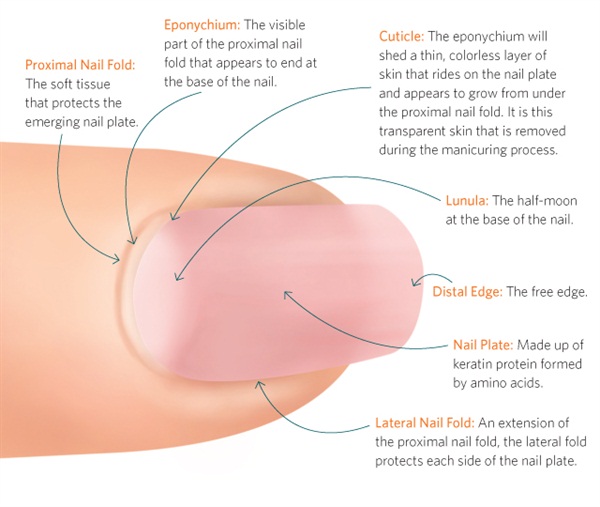
The eponychium is an extension of your proximal nail fold, and it’s the part of your nail that prevents bacteria and dirt from entering your body. Its purpose is to form a seal between your nail plate and your proximal nail fold. This part should not be cut, manipulated, pulled or lifted, lest you suffer the consequences of a nail infection.
Your true cuticle is the thin, colourless layer of skin cells just below your eponychium that is removed in the manicuring process. The cuticle forms as a result of your eponychium shedding skin cells; these cells then adhere to the nail plate as your nail grows out. Removing this layer neatens the appearance of your nails, in addition to improving the adhesion of your nail polish and acrylics.
So, now that we’re clear on the anatomy, let’s get into how to get your nails looking spick and span the right way:
View this post on Instagram
Cuticle care step #1: Clean your hands (and feet!) thoroughly
Ideally, you’ll want to give your hands a good scrub-a-dub with soap and warm water. If you have any polish or product on your nail, this is the time to remove it (thoroughly). You do not want to go into your cuticle care with dirty mitts—that’s just asking for a nasty infection to brew.
Next, you’ll want to soak your nails for at least 5 to 10 minutes to help soften the cuticle and prep it for the following steps.
Cuticle care step #2: Slick up with cuticle oil
Just as your skin needs moisturising, your cuticles need conditioning. Keeping your cuticles and your eponychium moisturised will get your nails to grow out healthier, and make it easier for you to keep your unruly cuticles at bay.
TRY: Sephora Collection Cuticle Care, RM36
Alternatively, you can opt for a cuticle exfoliator or a cuticle remover—these work to remove dry or crusty cuticles without the need for water or cuticle clippers.
TRY: Orly Cutique Cuticle Remover 18ml, RM99
View this post on Instagram
Cuticle care step #3: Push back your cuticles
Pushing back your cuticles can be a thoroughly satisfying experience. It makes your nails look longer and neater, and prevents your acrylics or polish from flaking off prematurely. However, it’s important not to get carried away with it—you see, the way you push your cuticles back is key here.
TRY: Bachca Wooden Cuticles Sticks, RM21
The best course of action is to employ the help of wooden orange sticks; they are portable and gentle, which makes them ideal for the job. If you happen to have a metal cuticle pusher, that works perfectly too; just make sure to take extra caution as this tool is more likely to cause damage to your cuticle if used improperly. In a pinch, your own fingers can work too, though the result won’t be nearly as neat.
Then, rest your hand on a sturdy, flat surface to give yourself complete control and gently push your cuticle back towards the base of your nail using your preferred tool. You’ll know you’re going too far if it starts to hurt. When you’re done, you’ll want to gently exfoliate your cuticle with a scrub or a washcloth to remove any excess skin.
Cuticle care step #4: Cutting your cuticles
Should you cut them? The answer is: Sparingly!
The key is to exclusively tackle the stubborn excess dead skin and hangnails that exfoliating couldn’t quite tackle. Plus, when trimming the excess cuticle, make sure you’re only using a sterilised cuticle trimmer.
As for whether you should cut your eponychium? Absolutely not. We’ve already mentioned why, but we’ll reiterate that the last thing it needs is a snip. Damaging the eponychium opens your poor nail right up to all kinds of infection and irritation. This makes for neither an attractive nor a comfortable predicament, in addition to slowing your nail growth.
You may find that your nails develop ridges, white spots or lines as a result of cutting your eponychium. While you’re at it, do not pull or nibble at your hangnails, either; you may risk damaging or splitting the eponychium.
View this post on Instagram
Cuticle care step #5: Wash your hands again
This will help to remove excess cuticle oil and nail trimmings from your fingernails, and prep your nails for polish. Just make sure you’re drying your hands thoroughly with a clean washcloth before you get to painting your nails.
Cuticle care step #6: Do your handcare routine
READ: How To Take Care of Your Hands Beyond Moisturising
This sounds extra, but it doesn’t have to be. Following up your DIY manicures with a little cuticle oil, hand cream and SPF should suffice.
The cuticle oil still moisturises your cuticles, but when used after a manicure, it also acts as a protectant against environmental aggressors. This will help to keep your hard work pristine for longer. In fact, you should be using cuticle oil on a daily basis, even if you’ve not done your nails in a hot minute.
TRY: Sisley Paris Melting Hand and Body Cream 350ml, RM480
Further, using an adequate hand cream and SPF (or a hand cream with SPF) will further help to keep your skin moisturised and prevent sun spots and sunburn all-in-one!
READ: Brave the Blazing Sun This Summer With These New UV Essentials
If you’re still not confident that you’re cleaning your cuticles right, it’s probably best that you make an appointment with your manicurist—here’s a full list of all the nail salons you can explore!
For more nail stories, click here.
| SHARE THE STORY | |
| Explore More |


)