
For the uninitiated, iced gem biscuits might seem wholly unremarkable. After all, they’re just made of a basic, cream cracker-esque biscuit base, with a dollop of hardened, artificially-coloured, saccharine icing sugar on top. But man, for us 90s kids, one bite and it’ll bring back a flood of childhood memories getting sugar rushes gorging ourselves silly on these snacks.
Back then, iced gem biscuits were most commonly sold in jars or plastic containers at the back of the counter in local tuck shops or convenience stores. Known as biskut ais jem in Malay or 花占饼干 in Chinese, they were my go-to snack at my local haunt—the Kett Star store opposite my primary school in SS19, Subang. It was always busy with Lick Hung students craving for a treat or two after school, with everyone clamouring over the best goodies, not least because the auntie who manned the till was always extra generous with the candies she handed out.
Nowadays, iced gem biscuits are nowhere near as pervasive, being replaced instead by the recent flood of imported snacks like Peppa Pig candies, Pocky sticks, and the admittedly addictive salted egg chips. Still, these newer inventions have not managed to totally stamp out the timeless iced gem biscuits.
Weirdly enough, while we might think of iced gem biscuits as a Malaysian or Singaporean invention, it’s actually a snack first created in England in the early 2000s. According to the Straits Time, the biscuit bottoms were first made by Huntley and Palmer in Reading, Britain in the 1850s. The iconic icing came later in the 1910s. Since then, thanks to colonialism, and later capitalism, this British snack infiltrated the Malaysian food scene and quickly established itself as a firm favourite among Malaysian kids.
Despite its English origins, there is one key difference between the iced gem biscuits found in the UK and those we have here in Malaysia. Instead of the airy, crunchy cracker base we know and love, most British recipes for iced gems call for a buttery biscuit base that is reminiscent more of British shortbread than a Hup Seng cream cracker.
Curious as to the taste of the buttery, biscuity version, the pastry fiend in me had to try it out. So try it out I did, and I have to say, I am pleasantly surprised! It combines the best part of an iced gem—the icing—with the rich, crumbly goodness of a shortbread biscuit. Sure, some might say it doesn’t quite have that original sense of nostalgia, but in terms of flavour, this builds on the iced gem biscuits we grew up with, turning it into something that us Malaysians, even now as adults, would eat and enjoy, and not just because of that bit of childhood nostalgia.
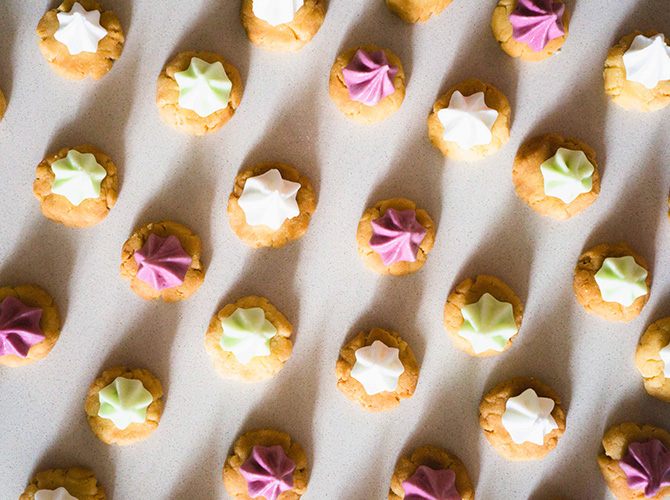
Also, since Christmas is nearly upon us, I thought it apt to make the icing in shades of red and green, combining the nostalgic Malaysian iced gem with the colours and comfort of Christmas! (Don’t worry, the colouring is all-natural; I made them from beetroot and pandan, which adds to their Malaysian-ness, in a sense!)
So make these iced gem biscuits for Christmas this year and relive your childhood sugar rushes!

Iced Gem Biscuits
Makes 40-50 biscuitsINGREDIENTS
Biscuit base
- 60g butter
- 30g caster sugar
- 1 egg yolk
- 100g all-purpose flour
- ½ teaspoon baking powder
- ½ teaspoon salt
Royal icing (I made them in three different colours but you can do more if you like!)
- 1 beetroot, peeled and roughly chopped
- 1 tablespoon lemon juice
- 3-5 pandan leaves
- 2 egg whites
- 450g icing sugar

DIRECTIONS
-
Biscuit base: Whisk the butter and sugar until it turns fluffy and lightens in colour. This should take 1-2 minutes of mixing. You can do this in a stand mixer, but with such small amounts, it whips up in no time at all even if you do it by hand. Add in the egg yolk and give it a quick whisk until it’s well-mixed. Then, add in the flour, baking powder, and salt, then fold it in until a smooth dough forms.
-
Heat your oven to 170°C. Roll the dough out until about 5mm (roughly ¼ inch) thick, then using a 2cm (¾ inch) ring mould, stamp out little discs of dough and place them onto a lined baking tray. If you don’t have ring moulds, you can weigh out 4g portions of dough, roll them into little balls and lightly pinch them so they flatten out. Either way, once you’ve done that for all of the dough, bake them in the oven for 12-16 minutes until they turn a nice shade of golden brown. When they’re done, take them out and let them cool to room temperature.
-
Red dye: To get your natural red dye, juice your beetroot and add lemon juice to it, then reduce it until a quarter of the liquid is left and it becomes a thick syrup. If you don’t have a juicer, don’t fret. (I didn’t either.) You can use a blender to puree your beetroot together with the lemon juice until smooth. If you’re having difficulty blending it, add a few tablespoons of water. Strain the pureed beetroot through a fine sieve, and then reduce this over medium heat until only a quarter of the liquid is left.
-
Green dye: For the green, cut up your pandan leaves into small, ½-inch chunks (a pair of scissors work best), and blend it in a blender together with 2-3 tablespoons of water. Then, strain the juice through a fine sieve. Your green dye is done!
-
Royal icing: (This is best done in a stand mixer or using an electric whisk, but doing it by hand works too.) Whisk your egg whites on high until it turns foamy and soft peaks start to form, add in the icing sugar in 2-3 batches, whisking the mixture until smooth in between each addition. Continue whisking the icing for about 8-10 minutes, until it becomes glossy and really firm.
-
Split your icing into three equal portions. Leave one plain, and add the red and green colouring to the other two. (You probably won’t use all of the colourings so just 1-2 teaspoons should do but you can add more or less depending on your personal colour preferences!) Give it a good mix until the colours smooth out, and put them into piping bags with a seven-sided star nozzle (D7). Then, pipe a little dollop onto each biscuit base!
-
Let the biscuits rest and the icing to firm up for at least an hour, after which you can relive all your childhood sugar rushes through them!
Follow Jun on his blog for more recipes and musings on food.
| SHARE THE STORY | |
| Explore More |


