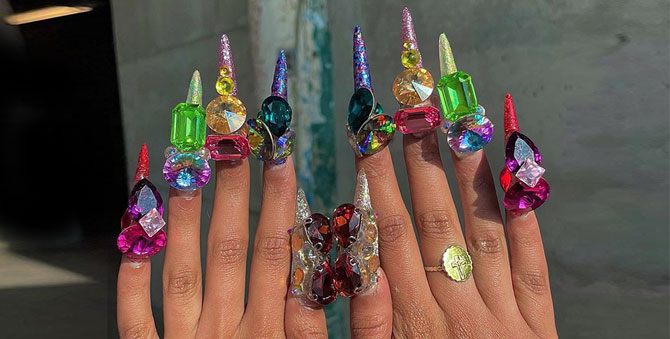
Okay, so you’ve bought yourself a killer set of press-ons and you’re keen to give them a whirl. There’s just one issue—this whole press-on process is a lot more fiddly than you had anticipated.
For starters, you can barely get them onto your nails in the first place! The first few claws went on fine, but once you’d added on the extra length to your index and thumb, you were left pitifully useless.
Then, of course, once you’d actually gotten them on, they had popped off within the hour. No matter how much glue you added or touched the nail up with, there would always be a casualty.
At this point, you’re probably on the ground, exasperated and near tears. We get it. However, here’s a truth you’re probably not ready to hear: It’s not the press-ons. It’s you.
Specifically, it’s your technique. Yes, fake nails can be a bit of a head scratcher to start, but with the right technique and some determination, they’ll become a breeze in no time. Ahead, we’re covering our best tried-and-tested methods for a flawless and long-lasting press-on manicure:
READ: Where to buy custom and ready-made press-on nails in Malaysia
Prepping your nails for the press-ons
- Cut and file down your nails
You’ll want to cut your nails shorter than the press-on, and file down the edges so that they are nicely shaped. - Push back your cuticles to give yourself the most natural look
If you’d like the most seamless result possible, push back your cuticles to make way for the fake nail. - Scrape away any leftover cuticle
This creates a smooth, even surface on your nail for the press-on to adhere to. - Buff over your nail lightly to gently scratch it up
This allows you to get a good grip for the glue to adhere to. Don’t go too crazy—you don’t want to weaken your nail. Just a few scores will suffice.
TIP: Pay close attention to the cuticle area. - Wipe down your nail with an alcohol wipe
This will help you to clean off any nail dust and natural oil on the surface of your nails, ensuring the best adhesion - OPTIONAL: Use a nail dehydrator for extra strong adhesion
- Get sticking (more on that below)
TIP: Whether you’re using nail glue or adhesive tabs, always do your index and thumb last—this makes it easier for you to pick up the individual nails.
With nail glue
- Prep your press-ons by swiping a little acetone over them
This will clear off any old glue (if any) and create a nice, dry surface for optimum adhesion - Apply a generous amount of nail glue directly to your nail
TIP: Make sure to add a little extra glue on the very tip of your nail to prevent lifting - Press on your fake nail
The best technique here is to push the nail down and back, then hold it in place for at least 20-30 seconds
With adhesive tabs
- Prep the press-on with a little alcohol
This will help remove any oils on the press-on that could interfere with adhesion - Stick the tabs onto the press-on, aligning it neatly with the edges
It’s important to be as precise as possible here—you do not want your tabs to be visible - Align the bottom edge of the press-on with your cuticle and press down firmly
TIP: The more accurate you are, the more natural this nail will look - Hold the nail in place for at least 20-30 seconds
Finally got them on? Yay! Now, check out our guide to taking off your press-ons damage-free!
READ: How to take off press-on nails without ruining your natural nails
Find more nail stories like this here.
| SHARE THE STORY | |
| Explore More |


