
Greeting cards used to climb out of the likes of Hallmark and cartoon characters with cheesy quotes on glossy paper. But today, it seems that people are looking for more refined, personalised, quirky cards that stand out; and the more handmade it looks, the better (and more expensive). But think about it this way: if it’s not created using computer illustrative software and printed on cards, it’s probably just pieces of paper glued together, attached with a funny quote of some sort, and presented in beautiful materials.
The best part is, creating your own greeting card isn’t that difficult. You don’t need a computer illustrator, or an industrial-sized printer to create the perfect greeting card; you just need a pair of scissors and glue, at the very least, and a few pieces of material to make the card. Here are five simple tips for you to get started:
Layers

Glue or attach anything everything over your base card, and layer them. Paper over paper, in different colours, textures and prints, for a minimalist but fun effect. Translucent papers or materials that are layered on top of each other create a beautiful, mystical effect. You can attach virtually anything onto your greeting card: ribbon, twine, string, buttons, fabric – anything. If you’re not too fond of cutting delicate shapes or designing patterns, you can use stickers or pattern stampers for paper.
Image from Grannemedselma.
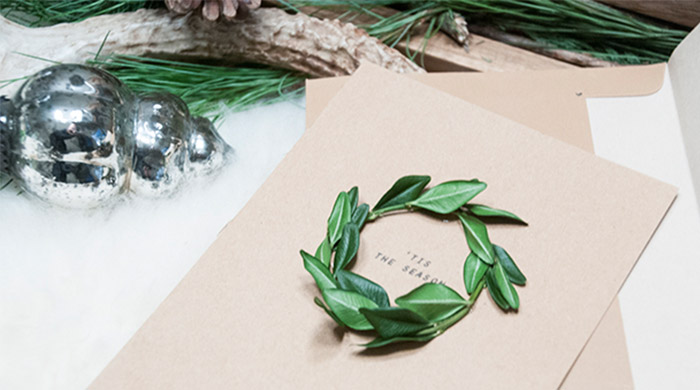
The 3D effect

While you’re adding layers, a 3D effect is all the rage today, to let your greeting card literally pop out at its recipient. You don’t have to go crazy with special paper-cutting techniques and manipulation; you just have to attach your layers with a thicker base using lightweight attachments such as double-sided foam tape or an “accordion” folded piece of paper underneath the layers. Also, instead of gluing an entire piece of paper flat onto the card, you could leave parts of it sticking out (i.e. butterfly wings and flower petals).
Image from Studio Calico.
Hand-drawn

Want to make it a little more traditional? You could draw or paint your own greeting card. And the trick is to just do the front of the card, leaving it minimalist and unfussy. There are plenty of minimalist designs that can make a simple card look amazing with just a matter of cleverly placed lines and dots. Just use a beautiful piece of white or brown card paper for the background and a black ink pen and keep it simple, or add little dots of colour here and there.
Image from Make and Takes.
Less is more

Don’t go overboard with the materials, textures and amount of stuff you’re attaching to the greeting card. If you’re not sure where to draw the line, stick to a colour theme, and make sure you leave enough room for your eyes to breathe when looking at the card. Keep it simple, or even minimalist, for a more “professional” outcome. If you want to go crazy with colours, play it safe with gradients, or a rainbow gradient at the most. But if you want to add some extravagance…
Image from Michelle Philippi.
…add some bling

If there’s one valid occasion to use glitter, it’s most definitely Christmas. Create glitter stencils for your card in your basic Christmas colours of red, silver, green, and gold, but keep it to a classy minimal. If you’re following a colour theme that isn’t that of the typical Christmas palette, go right ahead and get creative.
Image from Pinterest.
Cover image from Northstory.
Cover rubric image from Earnest Home Co.
Carousel image from Studio Calico.
| SHARE THE STORY | |
| Explore More |


